Claude Code로 긴 작업을 실행해 두고 다른 일을 하다 보면 작업이 끝난 것을 놓치는 경우가 종종 있습니다. 특히 AI가 사용자의 입력을 기다리거나 작업을 완료했는데도 한참 뒤에 확인하게 되는 경우가 생기곤 합니다.
저는 Windows의 Toast Notification을 이용해 Claude Code가 작업을 완료하거나 제 응답을 기다리는 순간 알림을 받을 수 있도록 설정했습니다.
이번 글에서는 BurntToast 모듈을 이용해 Windows 알림을 생성하는 방법과, Claude Code의 Hook 기능과 연동하여 작업 완료 및 사용자 입력 요청 시 알림을 표시하는 방법을 정리해 보겠습니다.
BurnToast 설치
BurntToast는 PowerShell에서 Windows Toast Notification을 쉽게 생성할 수 있도록 만들어진 모듈입니다.
Windows 10과 Windows Server 2019 이상에서 사용할 수 있습니다.
https://github.com/Windos/BurntToast
GitHub - Windos/BurntToast: Module for creating and displaying Toast Notifications on Microsoft Windows 10.
Module for creating and displaying Toast Notifications on Microsoft Windows 10. - Windos/BurntToast
github.com
- PowerShell 사용해서 설치
Install-Module -Name BurntToast -Force- Chocolatey 사용해서 설치
choco install burnttoast-psmodule
기본 명령어
BurntToast의 모든 알림은 New-BurntToastNotification 명령으로 생성합니다.
가장 간단한 예시는 다음과 같습니다.
버튼 추가하기
Toast Notification에는 버튼도 추가할 수 있습니다.
예를 들어 블로그로 이동하는 버튼을 만들어 보겠습니다.
$MyBlog = New-BTButton -Content "Go to MyBlog" -Arguments "<https://truthgarnet.tistory.com/>"

New-BurntToastNotification `
    -Text "제 블로그에 환영합니다." `
    -Button $MyBlog
로고 변경하기
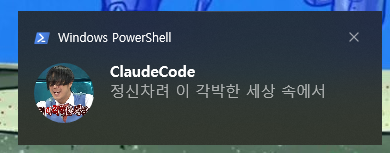
기본 아이콘 대신 원하는 이미지를 사용할 수도 있습니다.
-AppLogo 옵션에 이미지 경로를 지정하면 됩니다.
Import-Module BurntToast

New-BurntToastNotification `
    -Text "ClaudeCode", "정신차려 이 각박한 세상 속에서" `
    -Sound Default `
    -AppLogo "C:\Desktop\HybridSamySosaRioLaby.png"
사운드 추가
New-BurntToastNotification -Text 'Cookies are done' -SnoozeAndDismiss -Sound alarm
위의 명령어 말고도 지원하는 다양한 기능은 공식 문서를 참고하면 됩니다.
https://github.com/Windos/BurntToast/blob/main/Help/New-BurntToastNotification.md
BurntToast/Help/New-BurntToastNotification.md at main · Windos/BurntToast
Module for creating and displaying Toast Notifications on Microsoft Windows 10. - Windos/BurntToast
github.com

자주 발생하는 오류
BurntToast를 처음 설치하면 다음과 같은 오류를 만날 수 있습니다.
Import-Module : 이 시스템에서 스크립트를 실행할 수 없으므로 ...
또는
New-BurntToastNotification :
명령을 찾을 수 없습니다.

New-BurntToastNotification : 'New-BurntToastNotification' 명령이 'BurntToast' 모듈에 있지만 모듈을 로드할 수 없습니다.
대부분 PowerShell Execution Policy 때문에 발생하는 문제입니다.
해결 방법
현재 PowerShell 세션에서만 허용
Set-ExecutionPolicy -Scope Process -ExecutionPolicy Bypass
현재 사용자만 변경
Set-ExecutionPolicy -Scope CurrentUser -ExecutionPolicy RemoteSigned
설정을 변경한 뒤 다시 Import-Module BurntToast를 실행하면 정상적으로 동작합니다.
Claude Code Hook에 적용
BurntToast의 기본적인 사용법을 확인했으니, Claude Code의 Hook 기능과 함께 사용해볼 차례입니다.
저는 다음 두 가지 이벤트에 알림을 연결했습니다.
- Stop : Claude가 작업을 완료했을 때
- PermissionRequest : Claude가 사용자 입력을 기다릴 때
Cluade Code에서 /hooks 을 선택해서 Hooks Stop Hook 메뉴를 열면 다음과 같은 화면이 등장합니다.


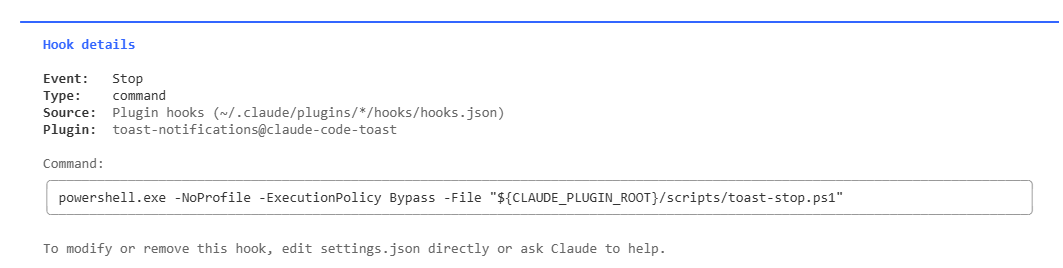
그 중에서 Stop Hook을 찾아서 선택하면, 다음과 같은 안내가 표시됩니다.
To modify or remove this hook, edit settings.json directly...
Claude에게 수정하도록 요청할 수도 있지만, 저는 직접 .vscode/settings.json을 수정했습니다.

Command를 아래와 같이 변경하면 됩니다.
"command": "powershell -ExecutionPolicy RemoteSigned -Command \"Import-Module BurntToast; New-BurntToastNotification -Text '{Title}', '{Contnet}' -Sound Default -Sound Default -AppLogo '{이미지절대경로}'\""
이제 아래와 같이 Claude Code의 작업이 끝날 때마다 Windows 알림이 표시됩니다.

PermissionRequest도 Stop과 같은 방식으로 설정할 수 있습니다.
PermissionRequest에서 사용할 수 있는 주요 필드는 다음과 같습니다.
| 필드 | 설명 |
| behavior | "allow"는 권한을 부여, "deny"는 거부 |
| updatedInput | "allow"에만 해당: 실행 전에 도구의 입력 매개변수를 수정 |
| updatedPermissions | "allow"에만 해당: 권한 규칙 업데이트를 적용, 사용자가 "항상 허용" 옵션을 선택하는 것과 동일 |
| message | "deny"에만 해당: Claude에게 권한이 거부된 이유를 알려줌 |
| interrupt | "deny"에만 해당: true이면 Claude를 중지 |
Stop과 설정하준 것과 같이 /hooks를 통해 들어가서 PermissionRequest를 찾아줍니다.

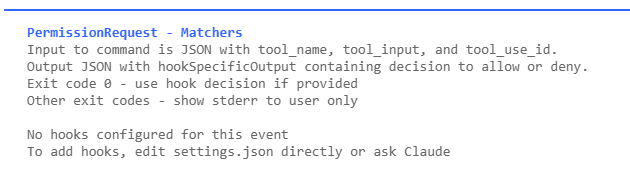
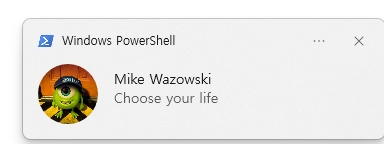
원하는 Command를 .vscode/settings.json에 입력하면 제가 좋아하는 캐릭터가 등장해 "Choose your life"라는 메세지를 띄어주게 됩니다.
마무리
BurntToast는 단순히 Windows 알림을 띄우는 모듈이지만, Claude Code의 Hook 기능과 함께 사용하면 활용도가 훨씬 높아집니다.
특히 AI에게 긴 작업을 맡겨두는 경우라면 작업 완료나 사용자 입력 요청을 즉시 확인할 수 있어 생산성이 크게 좋아집니다.
Windows 환경에서 Claude Code를 사용하고 있다면 한 번쯤 설정해 보는 것을 추천합니다.